|
Products:
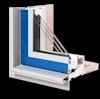
Sliding Patio Door - Installation
Instructions
Features • Product Description •
Thermal Performance
Available Sizes •
Installation Instructions
SUMMARY INSTALLATION INSTRUCTIONS
FOR THERMOTECH’S 2 PANEL SLIDING PATIO DOOR
WARNING: Doors must be installed by a skilled person, who is familiar with both modern construction and the rain screen principle. Improper installation voids warranties and damages buildings.
- Handle carefully. Store upright, under cover. Separate doors with non-abrasive material.
- Verify door size and location.
- Prepare rough opening.
- Cut and fold up exterior building paper at the top of the door, revealing about 6” (150mm) of sheathing.
- Create a sloped sill with a piece of clapboard.
- The clapboard needs to be at least as deep as the door.
- Cover the clapboard with a self-adhering waterproof membrane.
- It must overlap the clapboard by 6” (150mm) - both up each jamb and down over the building paper.
- Apply gussets in the bottom corners to ensure membrane is continuous.
- Set door into rough opening. Ensure the sloped sill is on the bottom.
- Shim the sill so that it is level.
- There must be shims under bottom right and bottom left corners, as well as the center.
- Ensure the sill is level. If the sill is not level adjust the shims until it is level.
- Add other shims as necessary to support the door, (typically every 24” (600mm)). IF THE SILL IS NOT LEVEL THE DOOR WILL NEVER WORK PROPERLY
- Shim door frame so that it is plumb and square.
- Shim the top left and right jambs, so that the jambs are plumb.
- Shim the bottom left and right corners, keeping the jambs plumb
- Add other shims as necessary to support the door frame, (typically every 24” (600mm)).
- Ensure that the door is not carrying any structural loads.
OPEN THE DOOR ¼” (5mm) THE GAP BETWEEN THE SLIDING PANEL AND THE FRAME SHOULD BE UNIFORM. LIKEWISE THE GAP BEWTEEN THE SLIDING PANEL AND THE CENTER INTERLOCK SHOULD BE UNIFORM. IF NOT RE-SHIM THE DOOR.
- Secure door to the building with screws.
- Screw the frame to the building at each shim
- Screws through the sill should be located in the outer portion of the sill – away from the where the door slides.
- The threads of these screws should be coated in caulk before being screwed into the sill. There must be screws within 4” (100mm) of each corner - in both directions.
- Check the function of the door.
- Open and close the door
- Check that it rolls smoothly and easily
- Check that it locks easily. If the lock does not engage, unscrew the strike plate’s center screw 1 turn.
- Install a drip edge over the door.
- It must extend at least 3” (75mm) upwards against the sheathing.
- It must also extend both out past and down over the outer face of the door by at least ¼” (6mm).
- Additionally, the drip edge must extend past each end of the door.
- Cover the vertical leg of the drip edge to the wall with a self-adhering waterproof membrane that completely overlaps the jamb membranes.
- Unfold the building paper down over the taped drip edge.
- A PROPERLY INSTALLED DRIP EDGE IS REQUIRED OVER THE TOP OF EACH DOOR.
- Join the door to the rest of the building to maintain a continuous air barrier.
- Caulk the interior edge of the sill to the self-adhering waterproof membrane below it. Along the jambs and head insulate between the rough opening and the window. Careful installers do this by using low expansion urethane foam. Be sure to carefully follow all the directions and warnings from the foam supplier. Be careful not to distort the frame by over insulating.
If you have any questions please call your dealer or Thermotech Windows at 888.930.9445 or 613.225.1101.
Sliding Patio Door
Features • Product Description •
Thermal Performance
Available Sizes •
Installation Instructions
Choose another style of
window/door:
Home
Contact Us Search
Why Thermotech Consumer's
Guide Products
Links Stephen's
Column Copyright
© 2010 by Thermotech Fiberglass Fenestration Ltd.
Telephone:
1-888-930-9445 Facsimile:
613-839-9066 Website
design and layout by 2Design Web
|