|
Products:
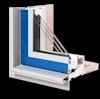
Framed Insulated Doors - Installation
Instructions
Features • Product Description
Available Sizes •
Installation Instructions
SUMMARY INSTALLATION INSTRUCTIONS
FOR THERMOTECH’S SWING DOOR
WARNING: Doors must be installed by a skilled person, who is familiar with both modern construction and the rain screen principle. Improper installation voids warranties and damages buildings.
- Handle carefully. Store upright, under cover. Separate doors with non-abrasive material.
- Verify door size and location.
- Prepare rough opening.
- Cut and fold up exterior building paper at the top of the door, revealing about 6” (150mm) of sheathing.
- Create a sloped sill with a piece of clapboard.
- The clapboard needs to be at least as deep as the door.
- Cover the clapboard with a self-adhering waterproof membrane.
- It must overlap the clapboard by 6” (150mm) - both up each jamb and down over the building paper.
- Apply gussets in the bottom corners to ensure membrane is continuous.
- Set door into rough opening.
- Ensure the sloped sill is on the bottom.
- Remove packaging so that the door can open.
- Shim the sill so that it is level.
- There must be shims under bottom right and bottom left corners, as well as the center.
- Ensure the sill is level. If the sill is not level adjust the shims until it is level.
IF THE SILL IS NOT LEVEL THE DOOR WILL NEVER WORK PROPERLY
- Install the primary shims.
- Shim the top hinge and the top of the strike side of the door so jambs are plumb.
- Shim the bottom hinge and the bottom of the strike side of the door, so jambs stay plumb.
- Ensure that the door is not carrying any structural loads.
- Install the primary installation screws.
- Carefully open the door and install a 3” #8 screw through the top hinge.
- Install a 3” #8 screw through the bottom hinge.
- Install 3” #8 screws through the strike side hinges, placing the screws behind the weatherstripping
- Check the function of the door.
- Adjust the screws and shims until there is an even space (reveal) between the door and frame
- Install secondary shims and installation screws.
- Shim the center hinge and the strike plate, maintaining the even reveal
- Install 3” #8 screws through the center hinge and the strike plate
- If required to maintain a uniform reveal along each jamb, install shims at the midpoints between the 3 already installed shims
- Install midpoint 3” #8 screws through any shims, placing the screws behind the weatherstripping
- Adjust sweep.
- Adjust the sweep so that it uniformly engages the sill
- Adjust the sweep upward if there is too much friction between sweep and sill
- Screw the sweep into the door with the supplied screws
- Join the flange (if present) to the rest of the building to maintain a continuous drainage plane.
- Attach any installation flange to the building with screws
- Cover the jamb flanges with self-adhering waterproof membrane
- Install a drip edge over the door.
- It must extend at least 3” (75mm) upwards against the sheathing.
- It must also extend both out past and down over the outer face of the door by at least ¼” (6mm).
- Additionally, the drip edge must extend past each end of the door.
- Cover the vertical leg of the drip edge to the wall with a self-adhering waterproof membrane that completely overlaps the jamb membranes.
- Unfold the building paper down over the taped drip edge.
- A PROPERLY INSTALLED DRIP EDGE IS REQUIRED OVER THE TOP OF EACH DOOR.
- Join the door to the rest of the building to maintain a continuous air barrier.
- Caulk the inside edge of the sill to the self-adhering waterproof membrane below it.
- Along the jambs and head insulate between the rough opening and the door.
- Careful installers do this by using low expansion urethane foam.
- Be sure to carefully follow all the directions and warnings from the foam supplier. Be careful not to distort the frame by over insulating.
- Install the Hardware
- Install Latch and its strike plate so that it holds the door firmly closed.
- Install Deadbolt and its strike plate so that it locks the door without having to push on the door.
If you have any questions please call your dealer or Thermotech Windows at 888.930.9445 or 613.225.1101
Framed Insulated Doors
Features • Product Description
Available Sizes •
Installation Instructions
Choose another style of
window/door:
Home
Contact Us Search
Why Thermotech Consumer's
Guide Products
Links Stephen's
Column Copyright
© 2010 by Thermotech Fiberglass Fenestration Ltd.
Telephone:
1-888-930-9445 Facsimile:
613-839-9066 Website
design and layout by 2Design Web
Contact the Webmaster
|
We ship internationally!
1-888-930-9445

|